Tag Archives: prismacolor

Art Dump February 2013

3 Feb

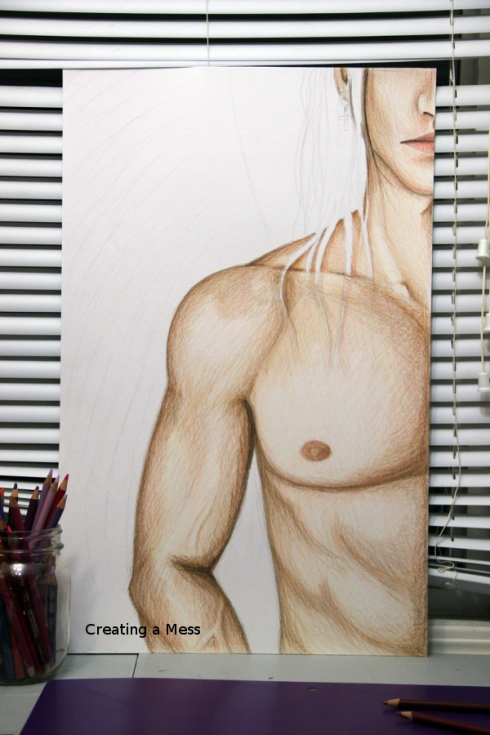
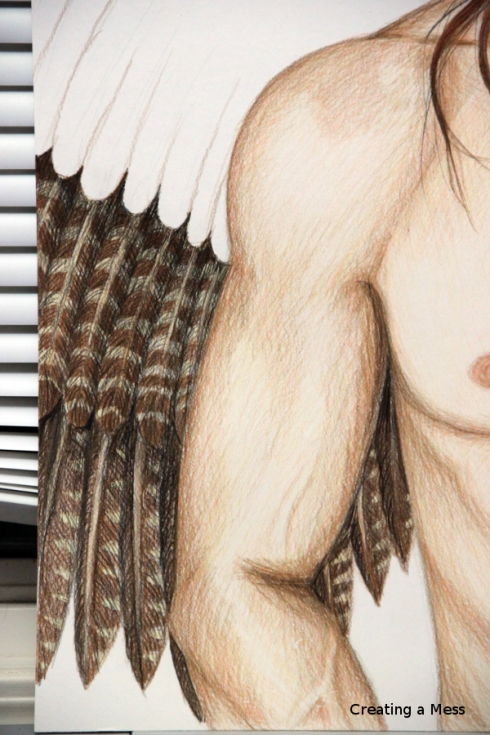
Alright, so I’ve been thinking about this for a little while, and I have finally decided to just do it. Every month or so, I am going to be uploading a post with the art I’ve done throughout the month. I’ve been pretty busy with some massive art projects (well… massive for me, and way more time-consuming than normal), and seeing as I haven’t written a real post in a month, I figured this would be a good way to jump back in before the tutorials come back in full swing. So, without further ado, these are some of the drawings and paintings I’ve done over the last couple of months.

Julian Done!

IMG_0665asmallwm

IMG_0959awmsmallcrop

IMG_0751awmsmallIMG_0635asmallwm

These are just a few of the pieces I’ve done (and two of them have already been added to other posts here), but almost all of them took a minimum of 10 hours, some as many as 16 or 17 hours to finish, depending on the size (some are 14×22 inches and one is 22×28 inches). So I haven’t really been slacking much in the creativity department, I just haven’t been able to create many tutorials recently. Speaking of tutorials, expect a new one involving latex and spikes this week! 😉

If you’re interested in following my art on Facebook, you can find my new page here. I post most of my stuff on there, including works in progress. Also, if you have a deviantART account, I just recently set up a page there, too, where I will be posting my favourites from what I draw and paint. You can find it here.

“James” Process – Drawing Steps

21 Dec

Alright, so I’m a couple of days late with my post for this week, but I promise you it was worth the wait. This project took me over 8 hours to complete, and is the best drawing I have ever done in my life (which is funny when I consider how many times I’ve spent more than 20 hours on a painting/drawing and it didn’t look nearly as good…).

Today I decided to not only show you the finished drawing, but to show you the process that I used to do it, from start to finish. This isn’t so much a tutorial as a “making of” post since I’m really inexperienced using pencil crayons for realism. There are other artists out there who can explain how to do this way better than I can.

The first thing I did was draw an outline. I don’t have a photo for this, though, seeing as you can see the outline in some of the photos already. It’s basically just to get the idea and basic shapes down on paper before diving in head first. After that, no matter what style I’m drawing or painting, I do the skin tone. I’ve always done it this way.

Step 1

This tends to take a while…

Step 1.5

Next I do hair. It didn’t take as long in this drawing as the skin did, but only because there’s not much there.

Step 2

When the skin and hair were both done, the only thing left to do was his wing. I did each individual feather separately, so it took a while to finish.

Step 3So after a couple of hours colouring and detailing feathers, I finally finished it. I’m actually really happy that it only took 8 hours. I expected to be working on this for most of the weekend, so it went a lot faster than expected.

And here is the finished product:

Done!

In case you’re wondering, it’s my character Jamie from my book (Guardians). It was all done using Prismacolor pencils on a 14×22 inch sheet of posterboard. There will be another one of these featuring my character Julian, although it may not be done for a little while.

Hope you enjoyed seeing my creative process! I’ll get back to some tutorials very soon – I’m working on a couple right now.